Connecting Stay Ai
ARPU takes over the upcoming charge notification that Stay Ai sends out to your subscribers.
Before you customize ARPU's email template and configure campaigns, you'll need to connect your Stay Ai account so products and customer data can be synced.
To connect, you'll need to generate an API key for ARPU to use in your Stay Ai account.
Go to Settings > API Keys and click the New API Key button. Fill out the form however you like, the most important part is that the Scope at the bottom is set to "All" (which should be the default).
After the key is created, go back to ARPU and click the Stay Ai button on the Dashboard. You'll then see a screen where you can paste your API key and connect.
Note: If you've previously connected a subscription platform, there will be a link on the ARPU Dashboard that allows you to connect Stay Ai shown below the subscription platform that is currently connected. If you're migrating active subscriptions to a different platform, be sure to reach out to support@getarpu.com so we can ensure a smooth transition.
Configuration
Once you've connected Stay Ai, you can start customizing your ARPU email template and setting up campaigns.
On the ARPU Dashboard, you'll see a checklist with links to all the areas in ARPU that can be customized to match your brand and appropriately target your subscribers.
In particular, configuring 1-time products to be used in your email templates and then creating custom campaigns for different subscriber segments are important areas to focus on. If you have any questions about upsells or campaigns, get in touch with us!
Enabling ARPU
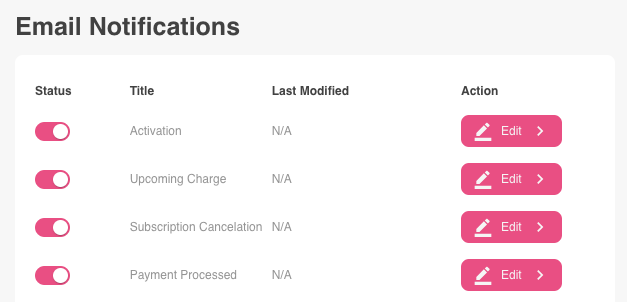
After you're done testing the templates and campaigns, you'll need to go disable your upcoming charge email in Stay Ai before you enable sending in ARPU. Go to Notifications > Email and toggle off the Upcoming Charge notification.
After the Stay Ai notification is disabled, go back to ARPU and click the store name in the top of the left sidebar to enable sending.
ARPU's upcoming charge notification emails will begin sending based on your Upcoming Email Settings, which determines how many days in advance the upcoming email should be sent for each charge (the default is 3 days).
Once emails begin to queue up, you can click "Upcoming" in the left sidebar to see when emails will be sent.